First round of images from the ASI294MM pro

We have had some great weather down here in south Texas the last few weeks so I was able to get a lot of use out of the new 294mm. Really have nothing but love for the 294. The images speak for themselves. Here are a few that I was able to capture in SHO, each one between 8-10 hours of integration.


I have notices some interesting color over the 1600mm after my initial SHO combinations and enhancing them has been easy. This camera will be my workhorse for the foreseeable future and I’m super excited to see how galaxies start coming out soon. Next thing I will be testing will be the 294mm with a combination of Ha and LRGB astronomic deep sky filters on andromeda and horsehead. Stay tuned!

Some Examples of SHO / Hubble Pallet

Well Ive had my asi1600 gt for about 4 or 5 months now so I figured I would give an update on my progress. Its been a learning curve but not as bad as I thought. Imaging has gotten easier, editing has gotten crisper. The good thing is I feel like Im not hitting a ceiling at all and there are plenty of objects I still want to shoot and many more I want to reshoot and get a better image than before. But here are a few of my latest images with my 1600 -

All these images have been stacked and combined in astropixelprocessor, edited in pixinsight and photoshop, and finished in topaz denoise. Im hoping to do a workflow video when I get a chance to help anyone who might be struggling to edit their images so stay tuned!

Going Mono!

When I first started learning astrophotography a little over a year ago, I was excited to get started shooting. I did a lot of research and reading and skimmed over anything that detailed monochrome cameras and imaging. Who wants to take pics with black and white. The more I got into the hobby, the more I learned about it. Then my thought was “well I dont want to spend more time imaging.” Then I got to the point about a month ago where I was getting frustrated trying to make my images look like the mono images and the processing was getting very tedious with lots of varying outcomes. I felt like I had hit a wall. So I made the jump to mono and went with the asi1600gt:

camera.jpg

Yes its square and it doesn’t look as cool as my asi071mc pro but based on images I had seen with the similar 1600mm, this was the way to go. So why is mono better? Well I am definitely not an expert but when I started separating out channels in my color processing, it finally started to click what a mono does and how it is processed. So the difference between a mono camera and a color camera is basically a filter that sits over the sensor on a color camera and it lets red, blue, and green colors through. Well while that gives you awesome instant color images in real time on your ipad when imaging, you are missing out on many light photons that are just getting filtered out. With a mono camera, you shoot one color or signal at a time. The sensor is much more sensitive and receives much more of the color/signal you are shooting (just have to do it one at a time).

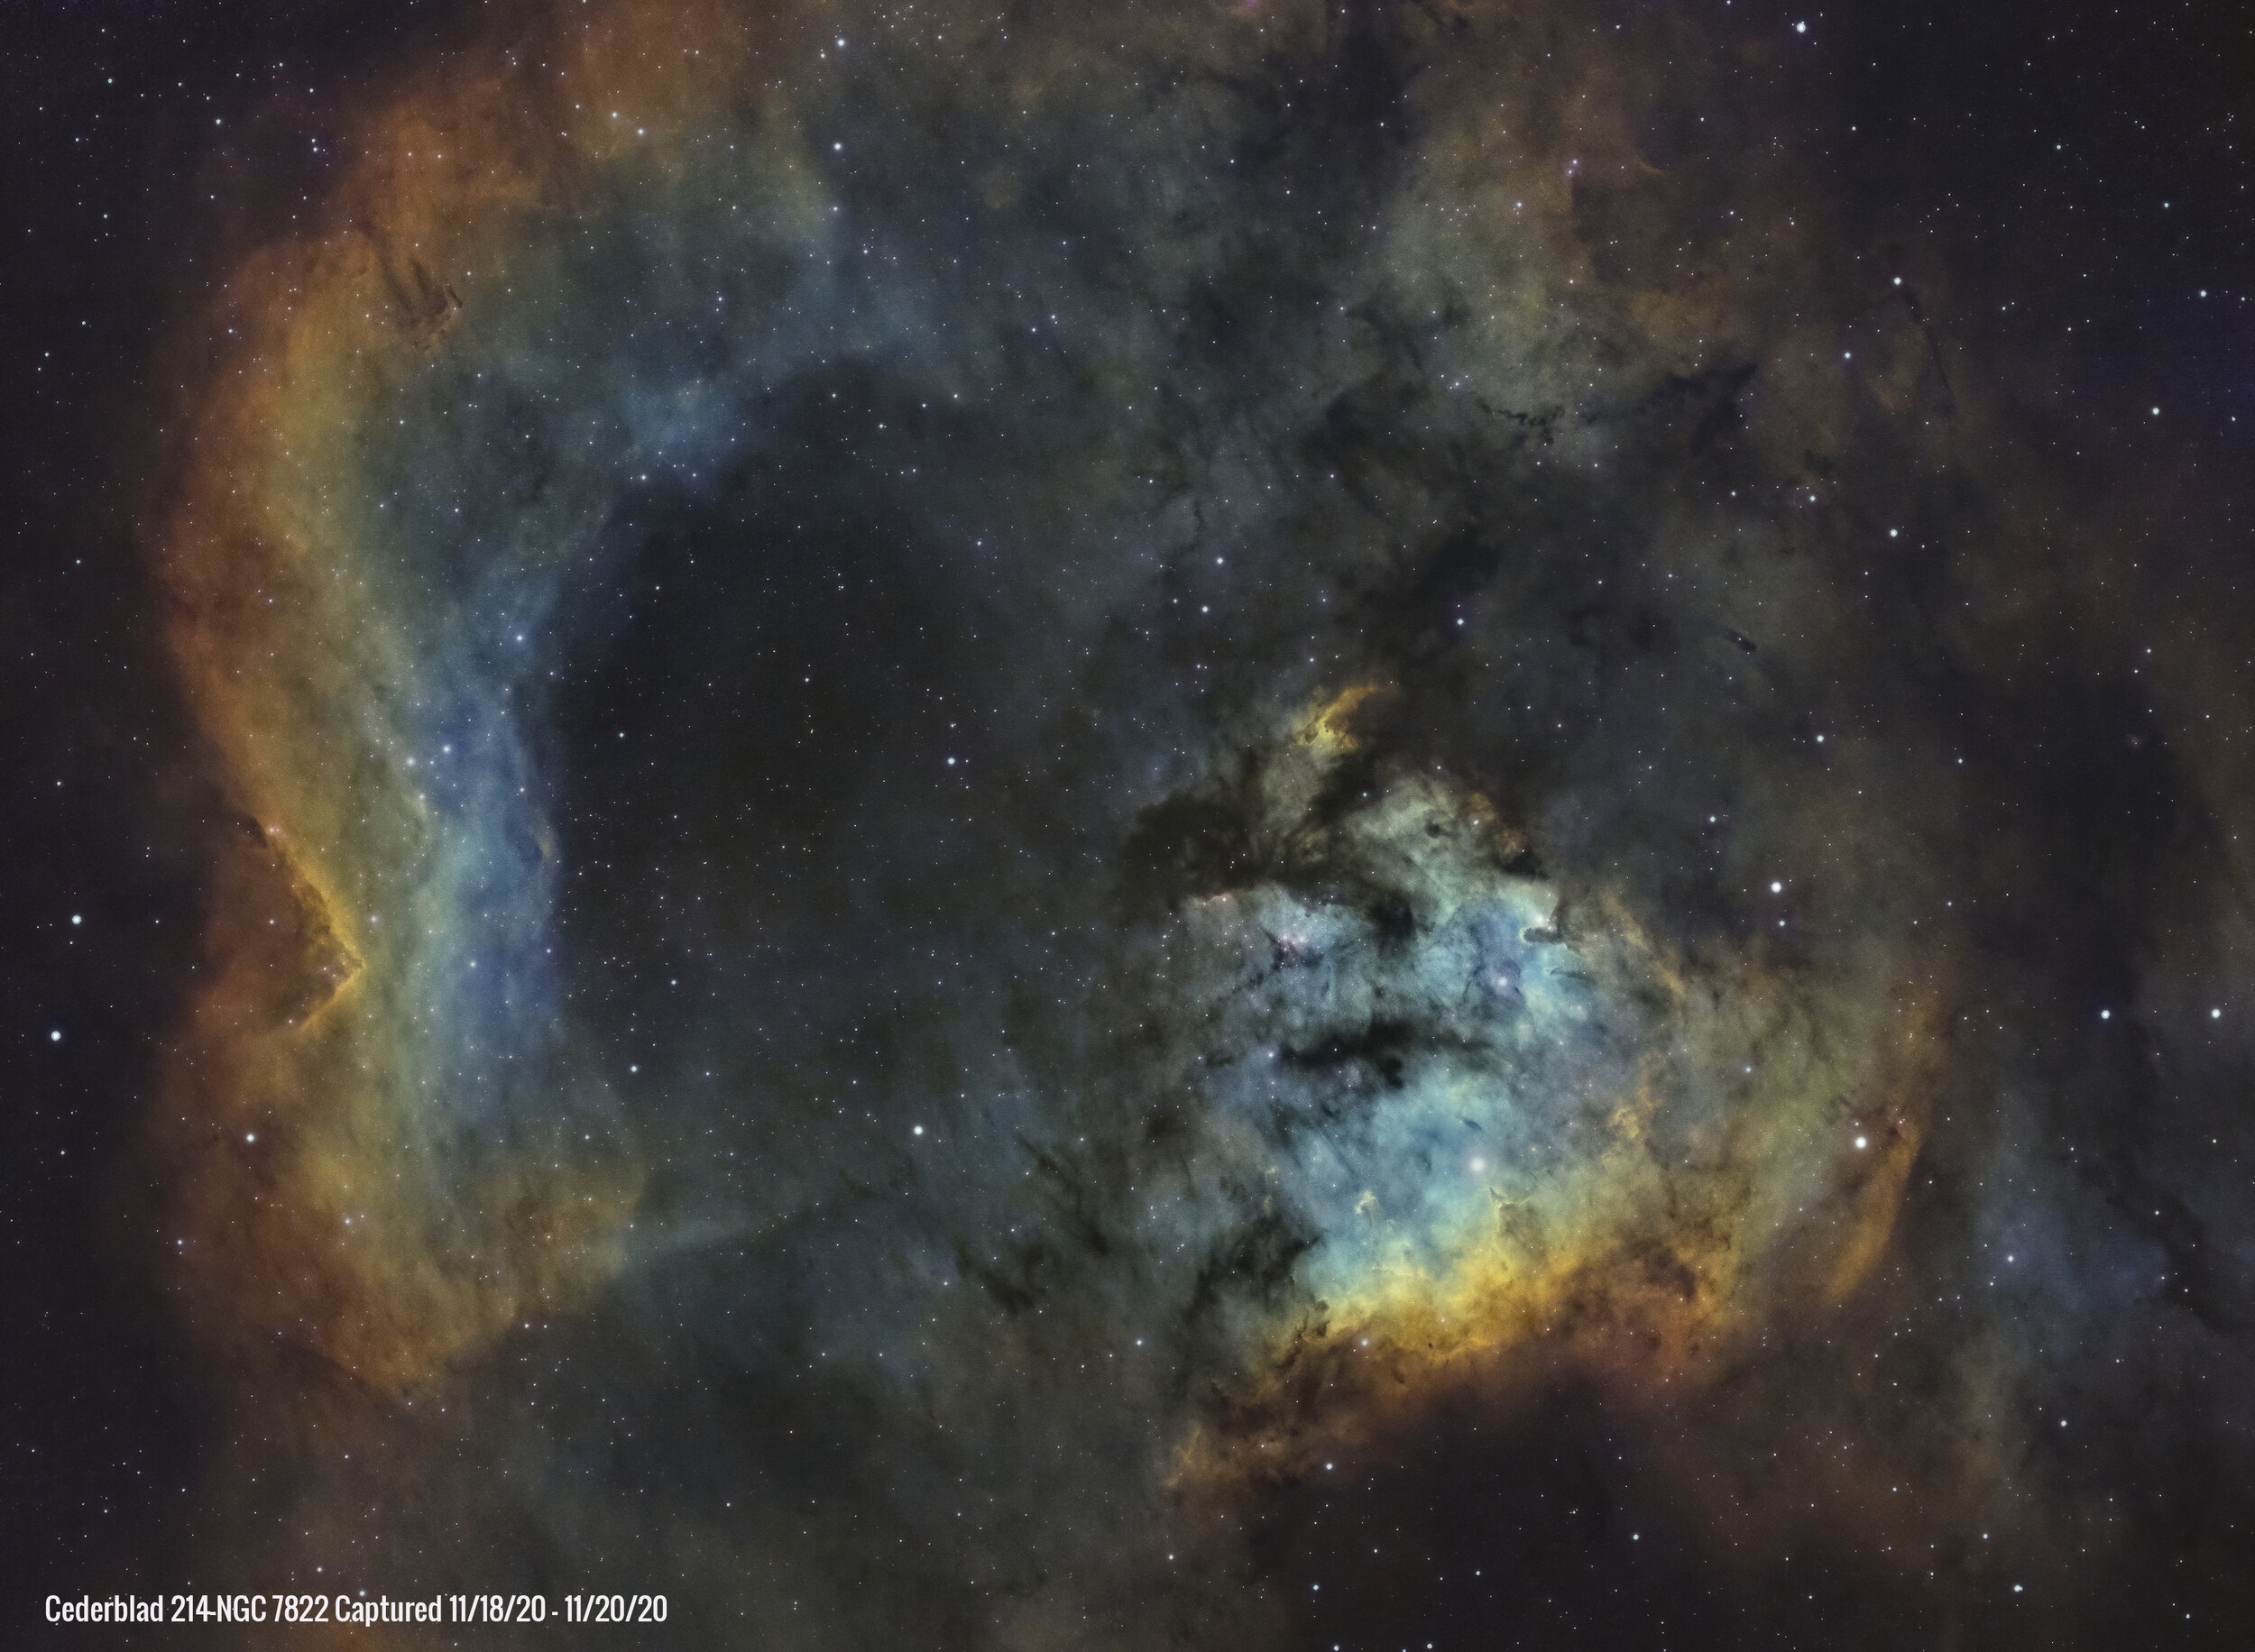
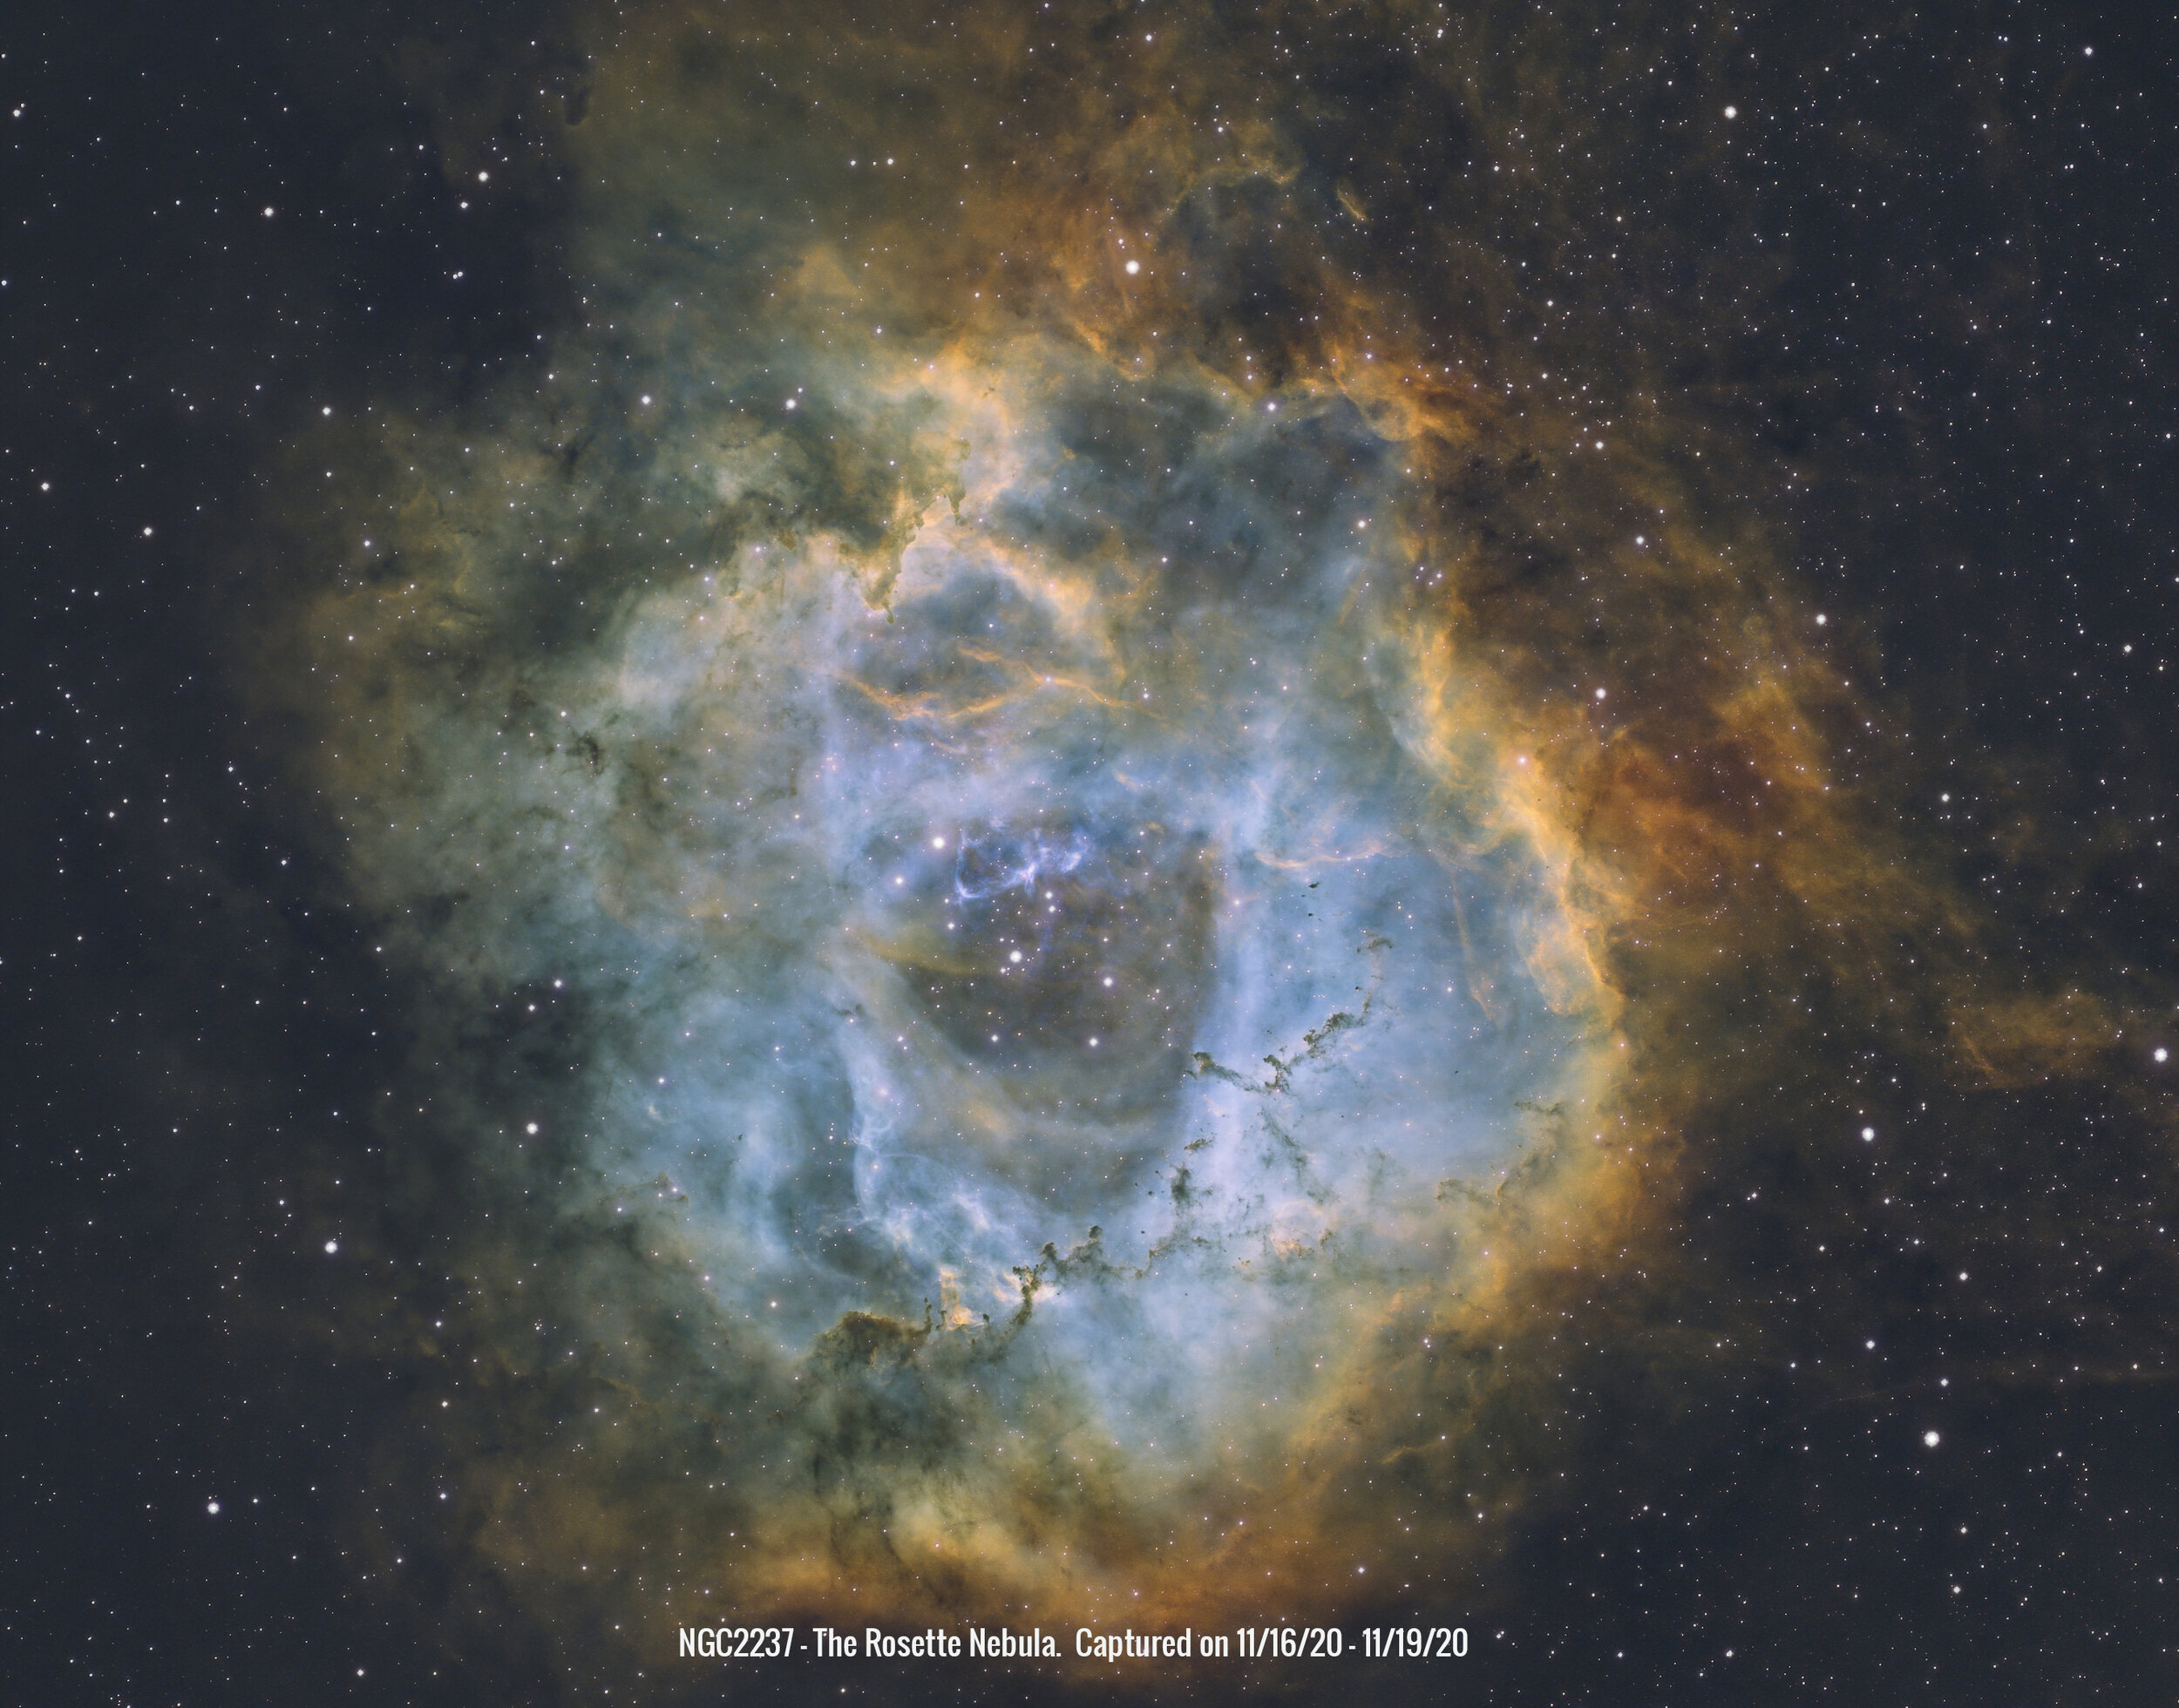
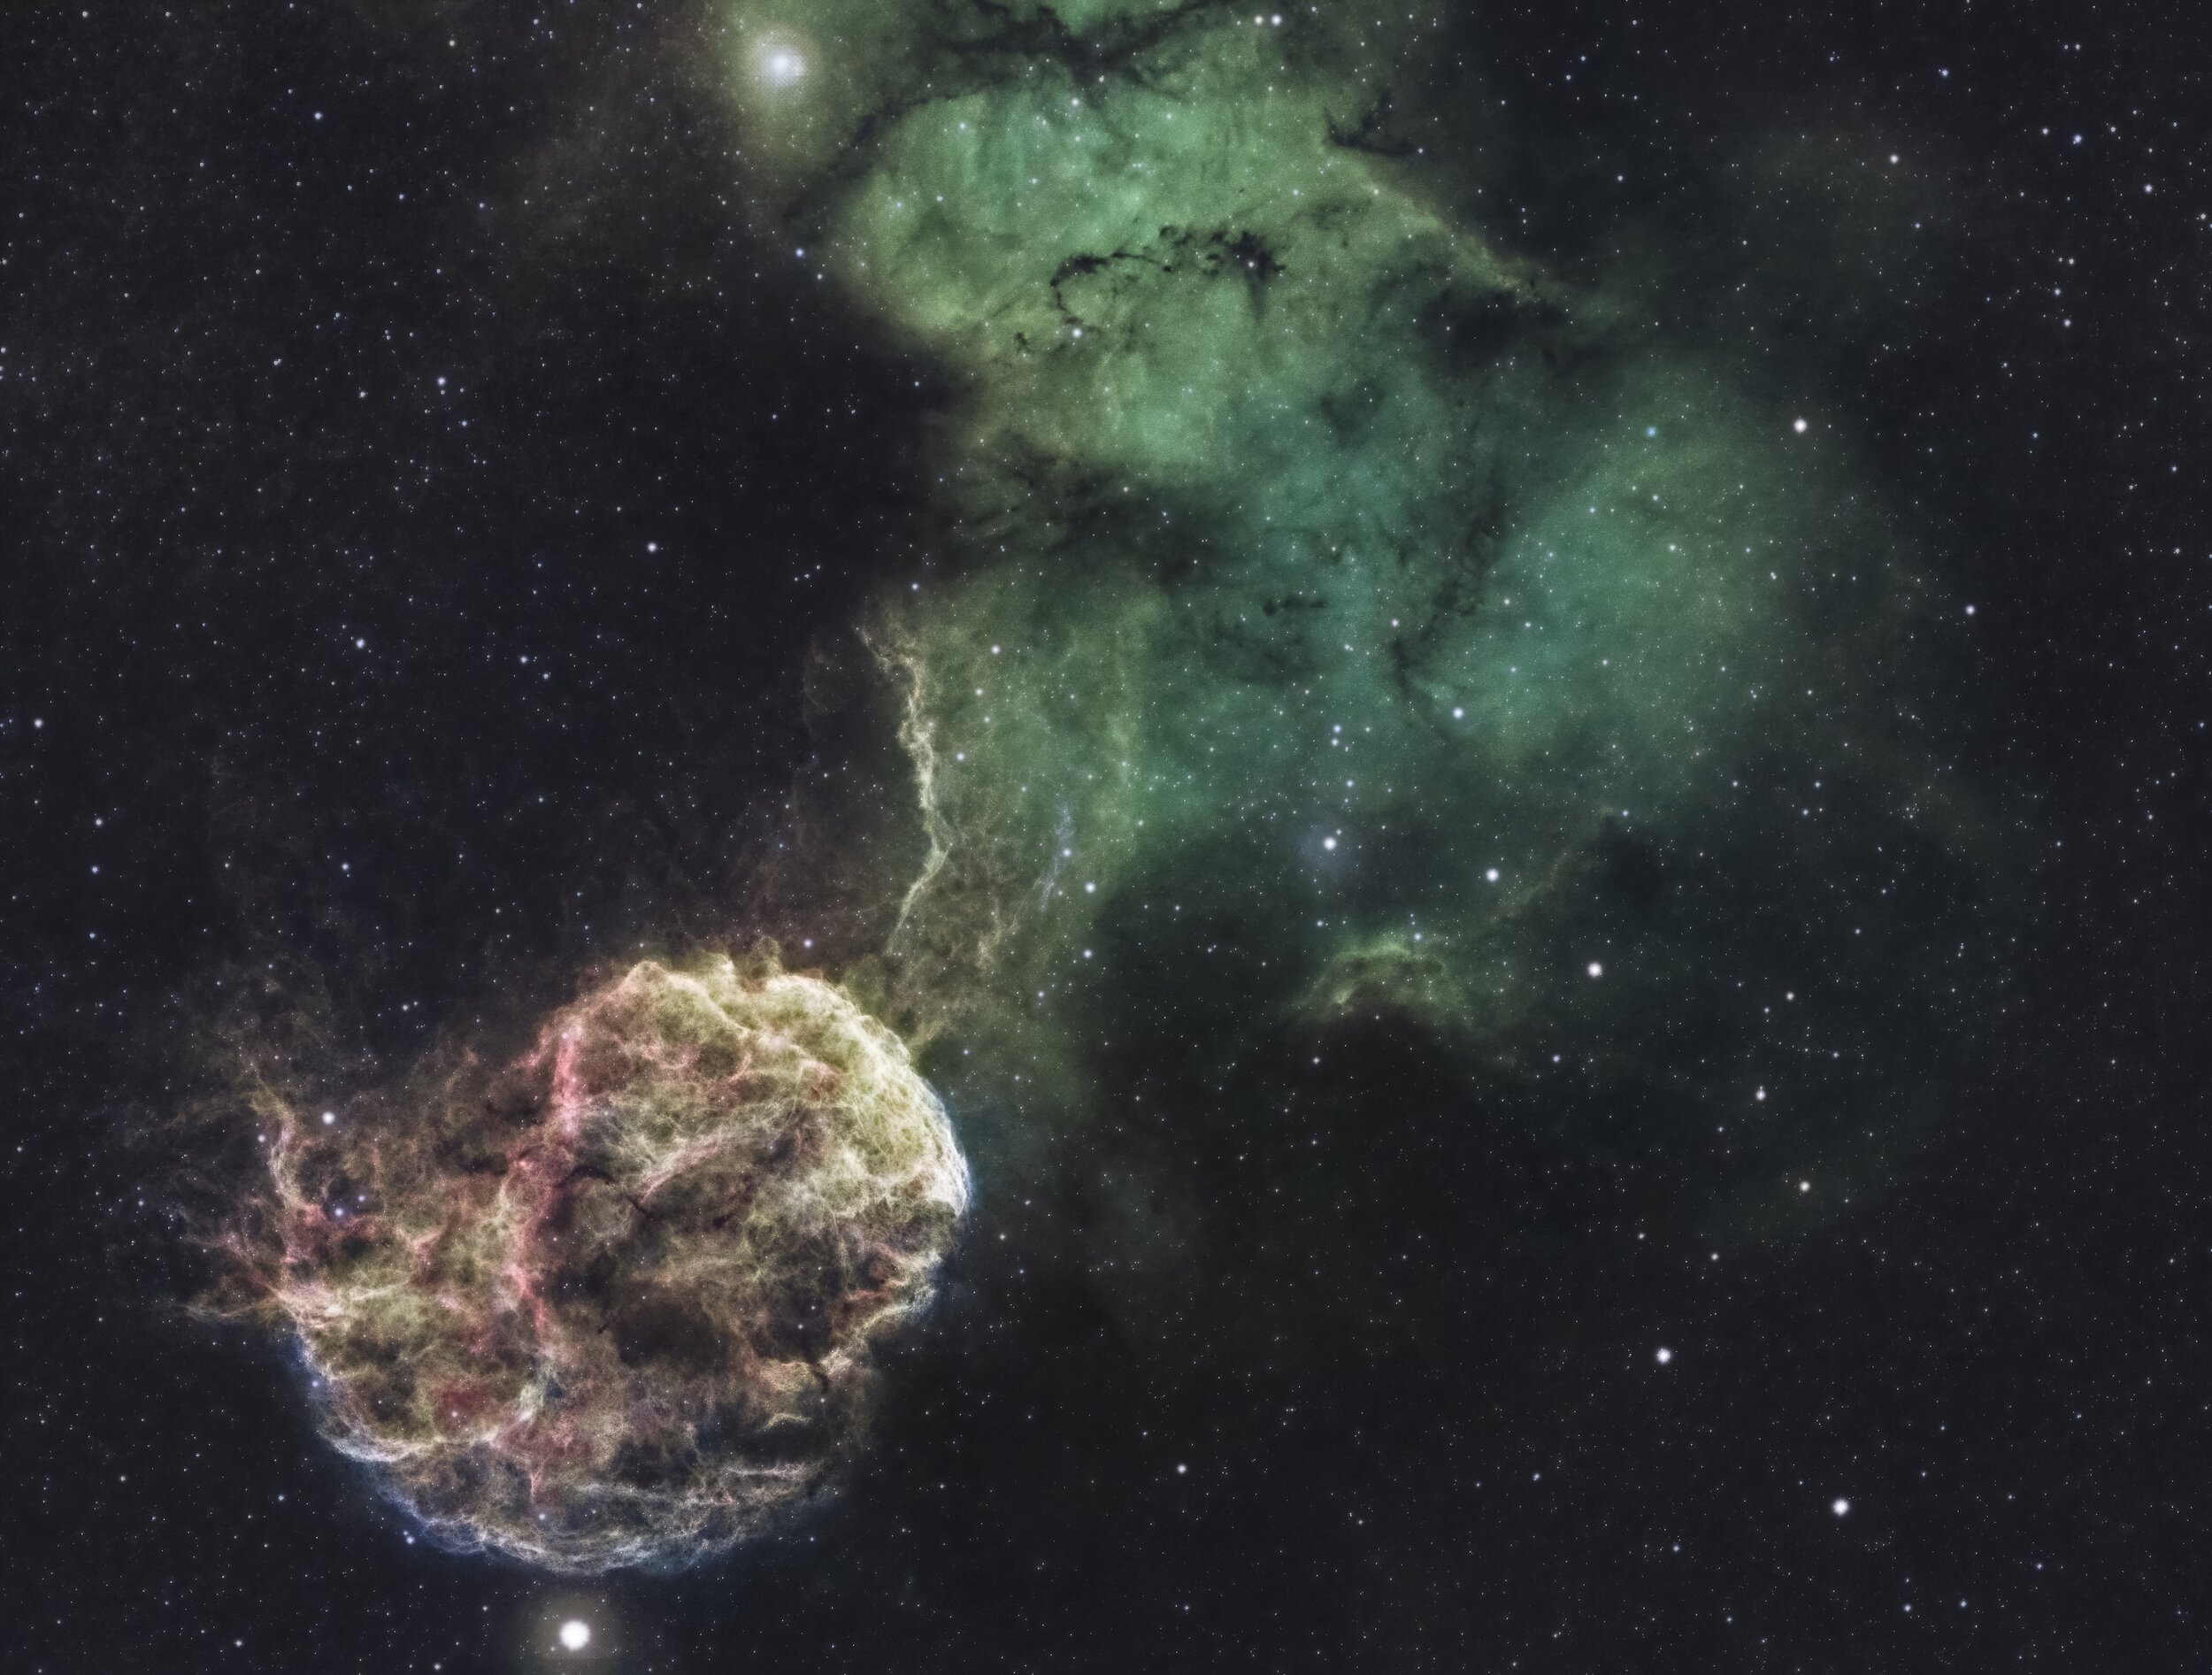
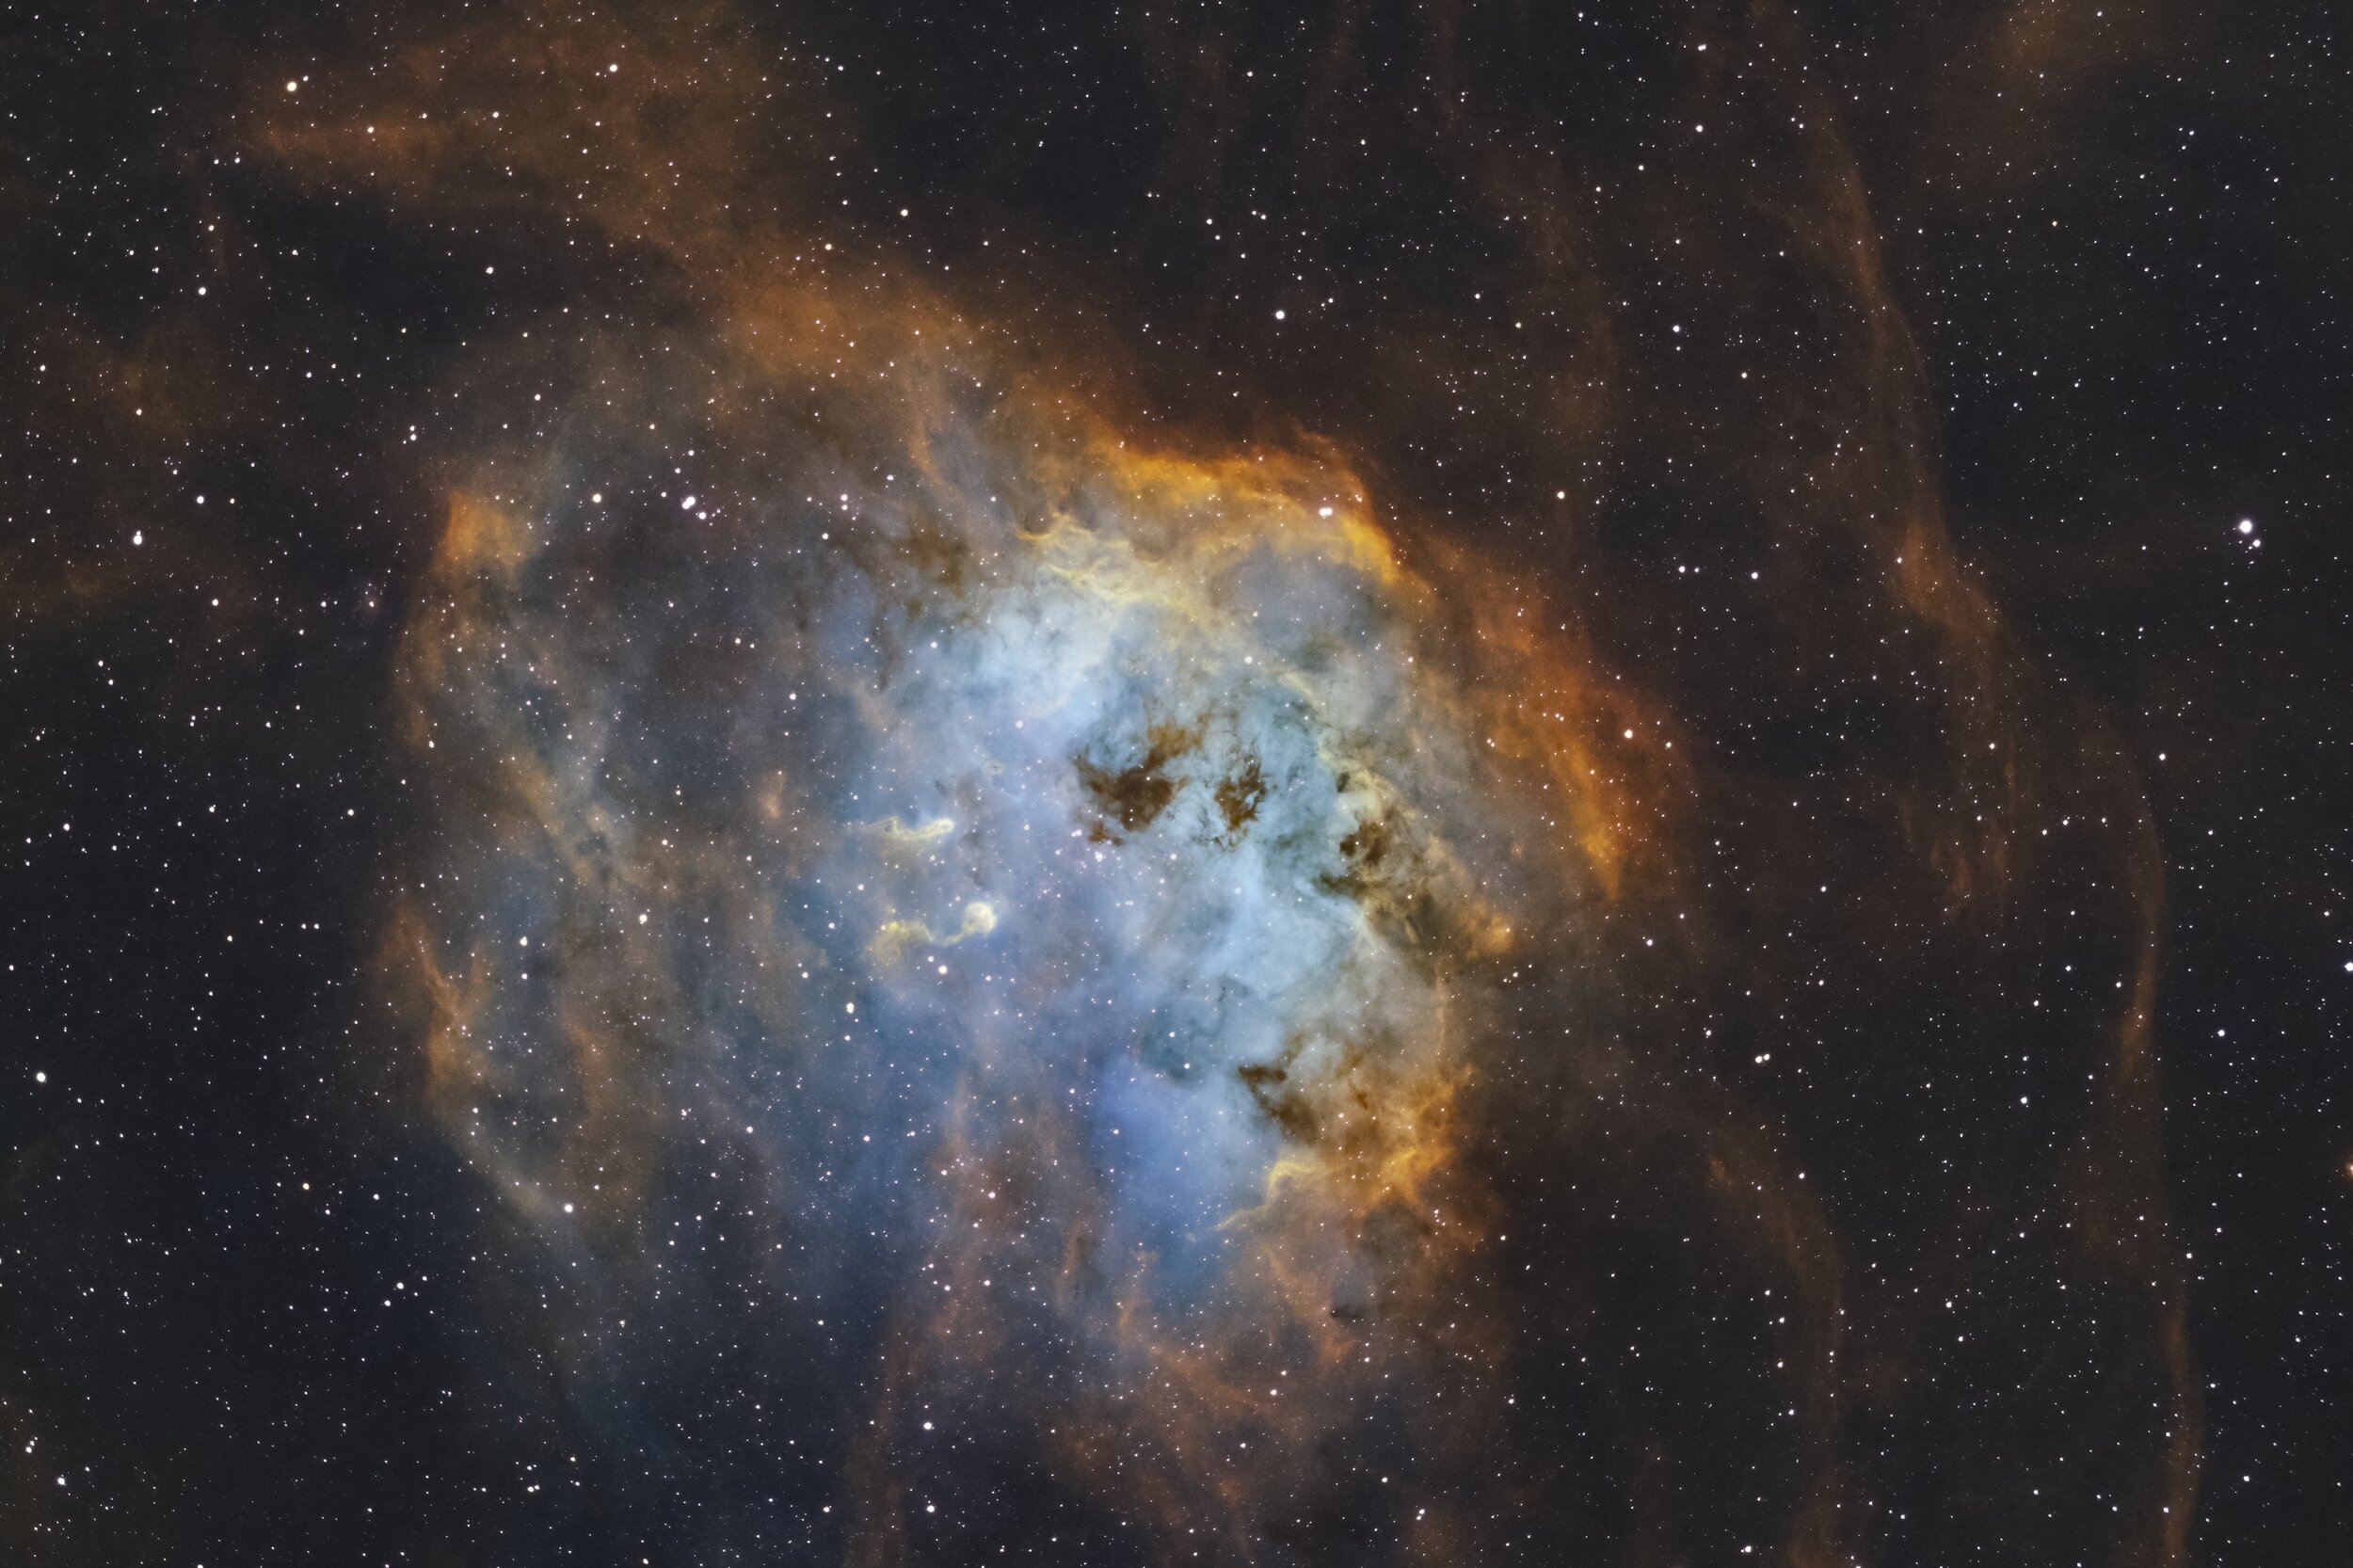
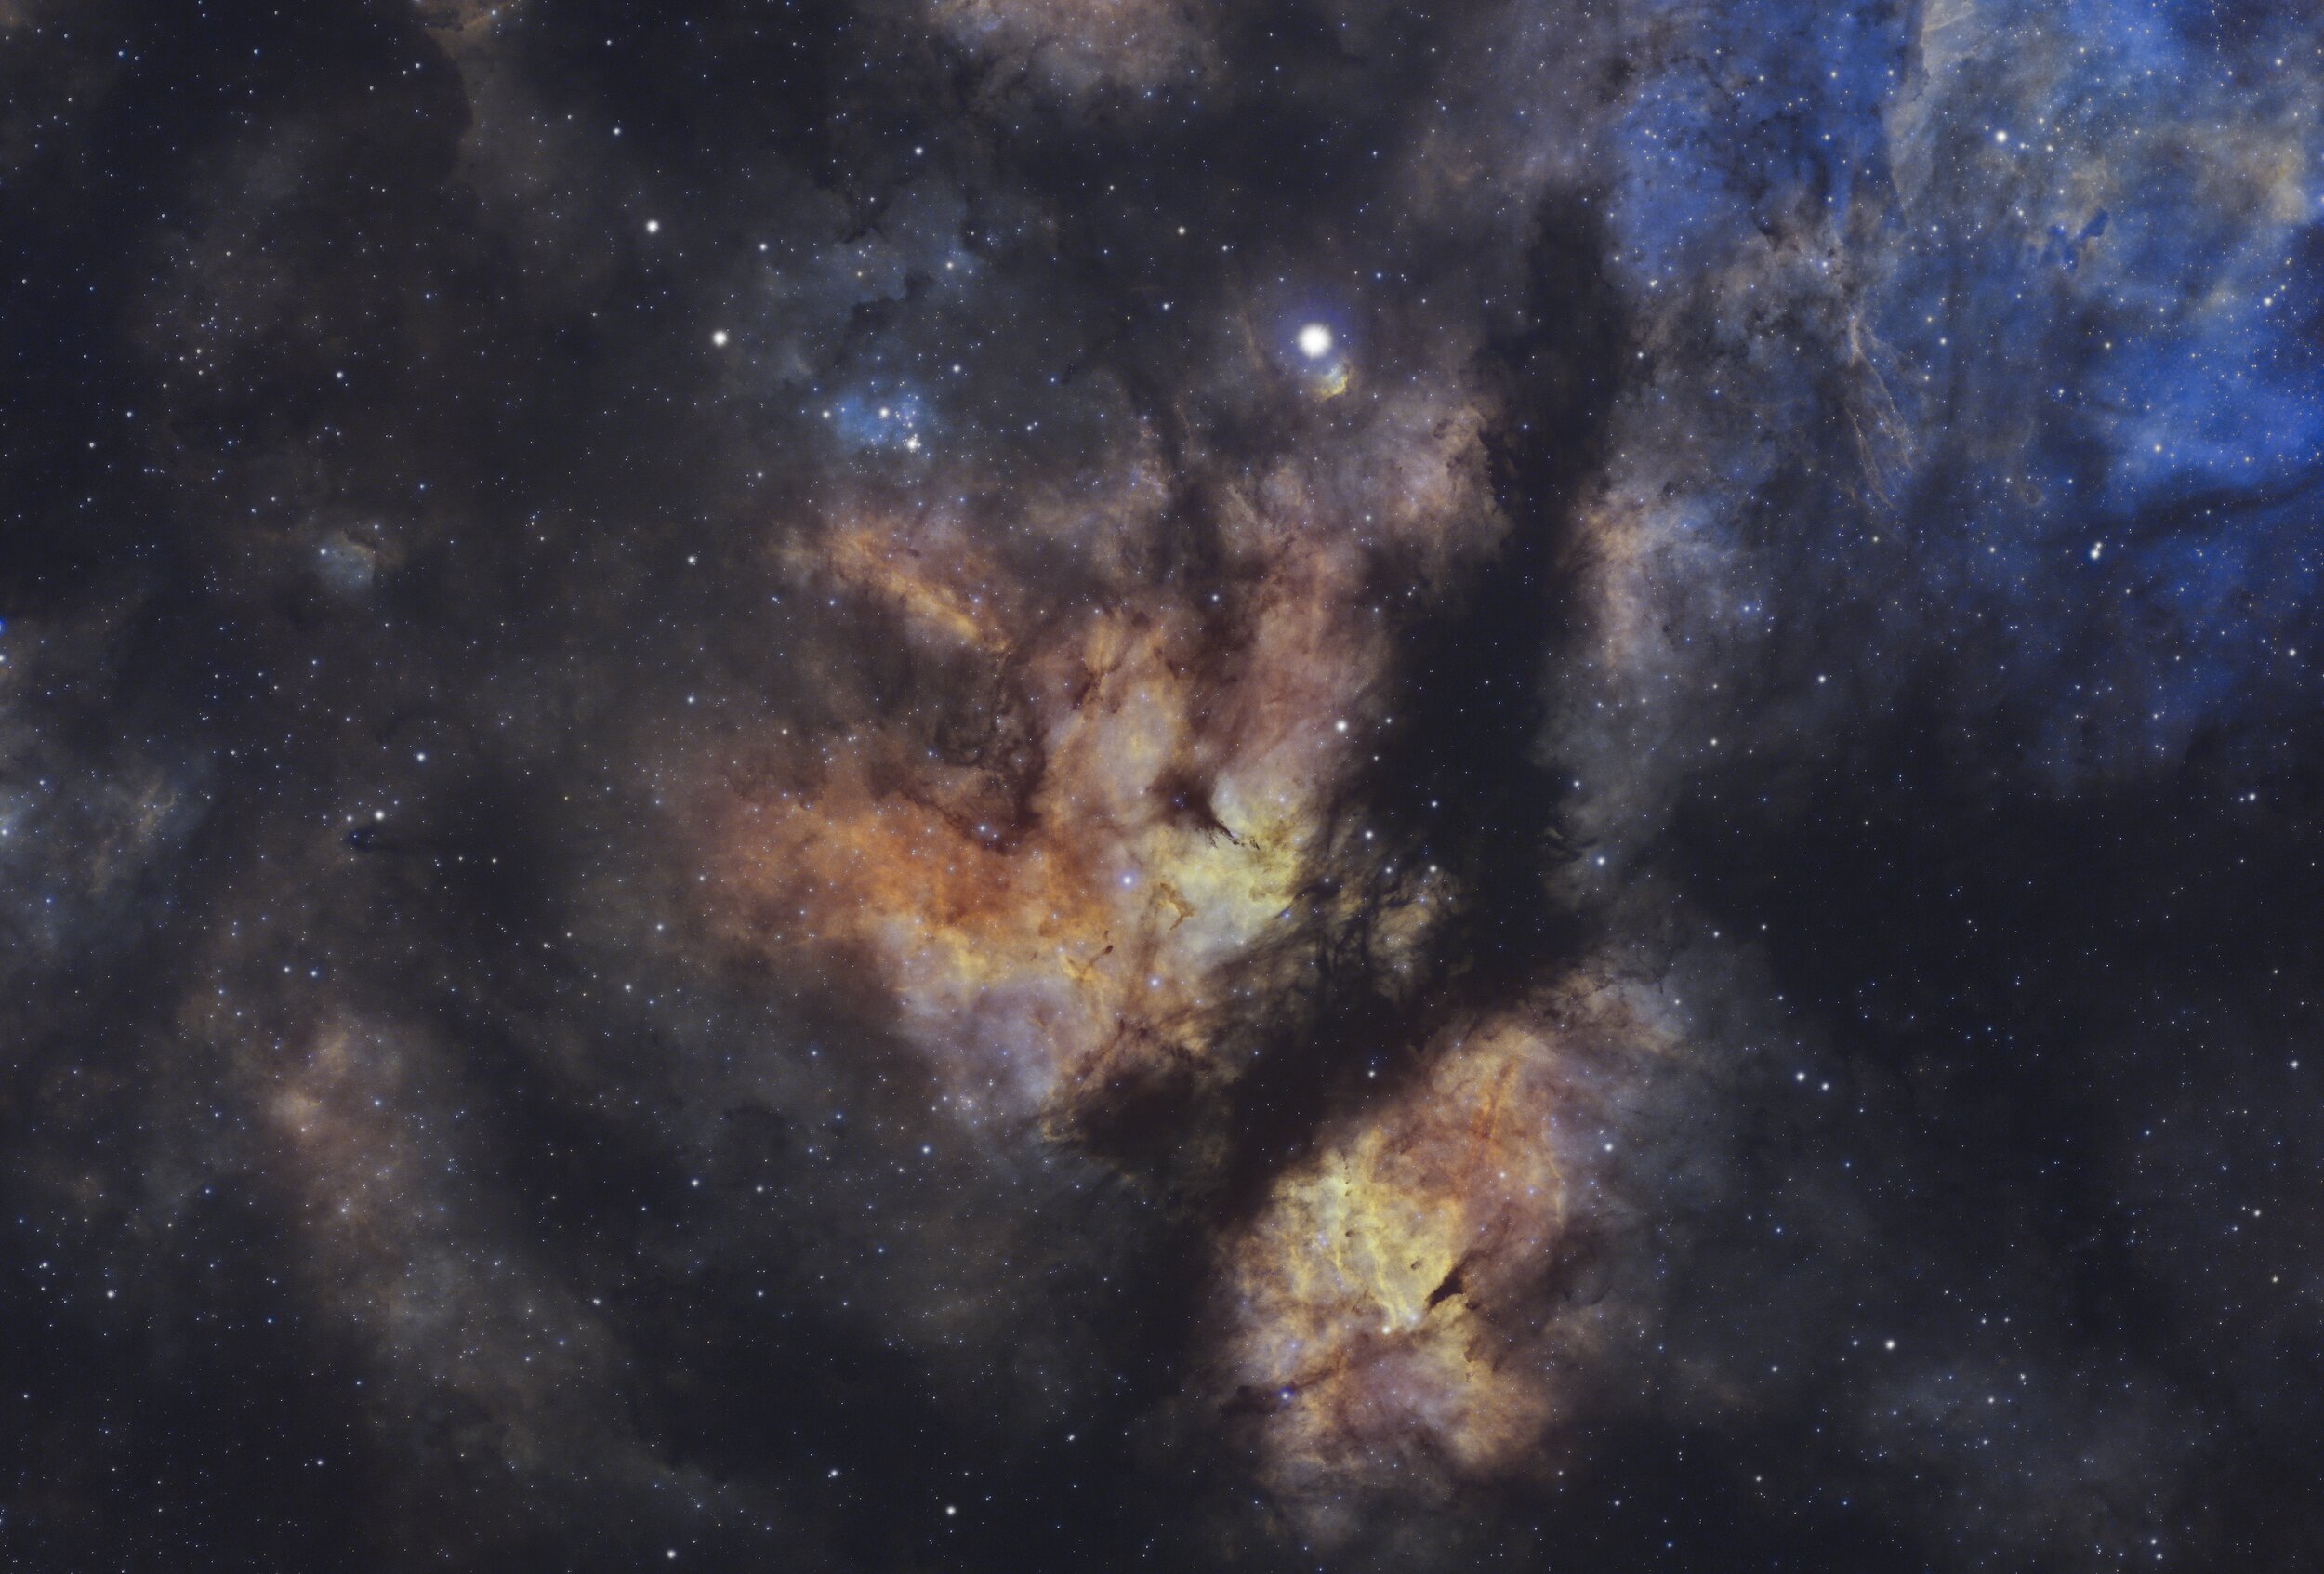
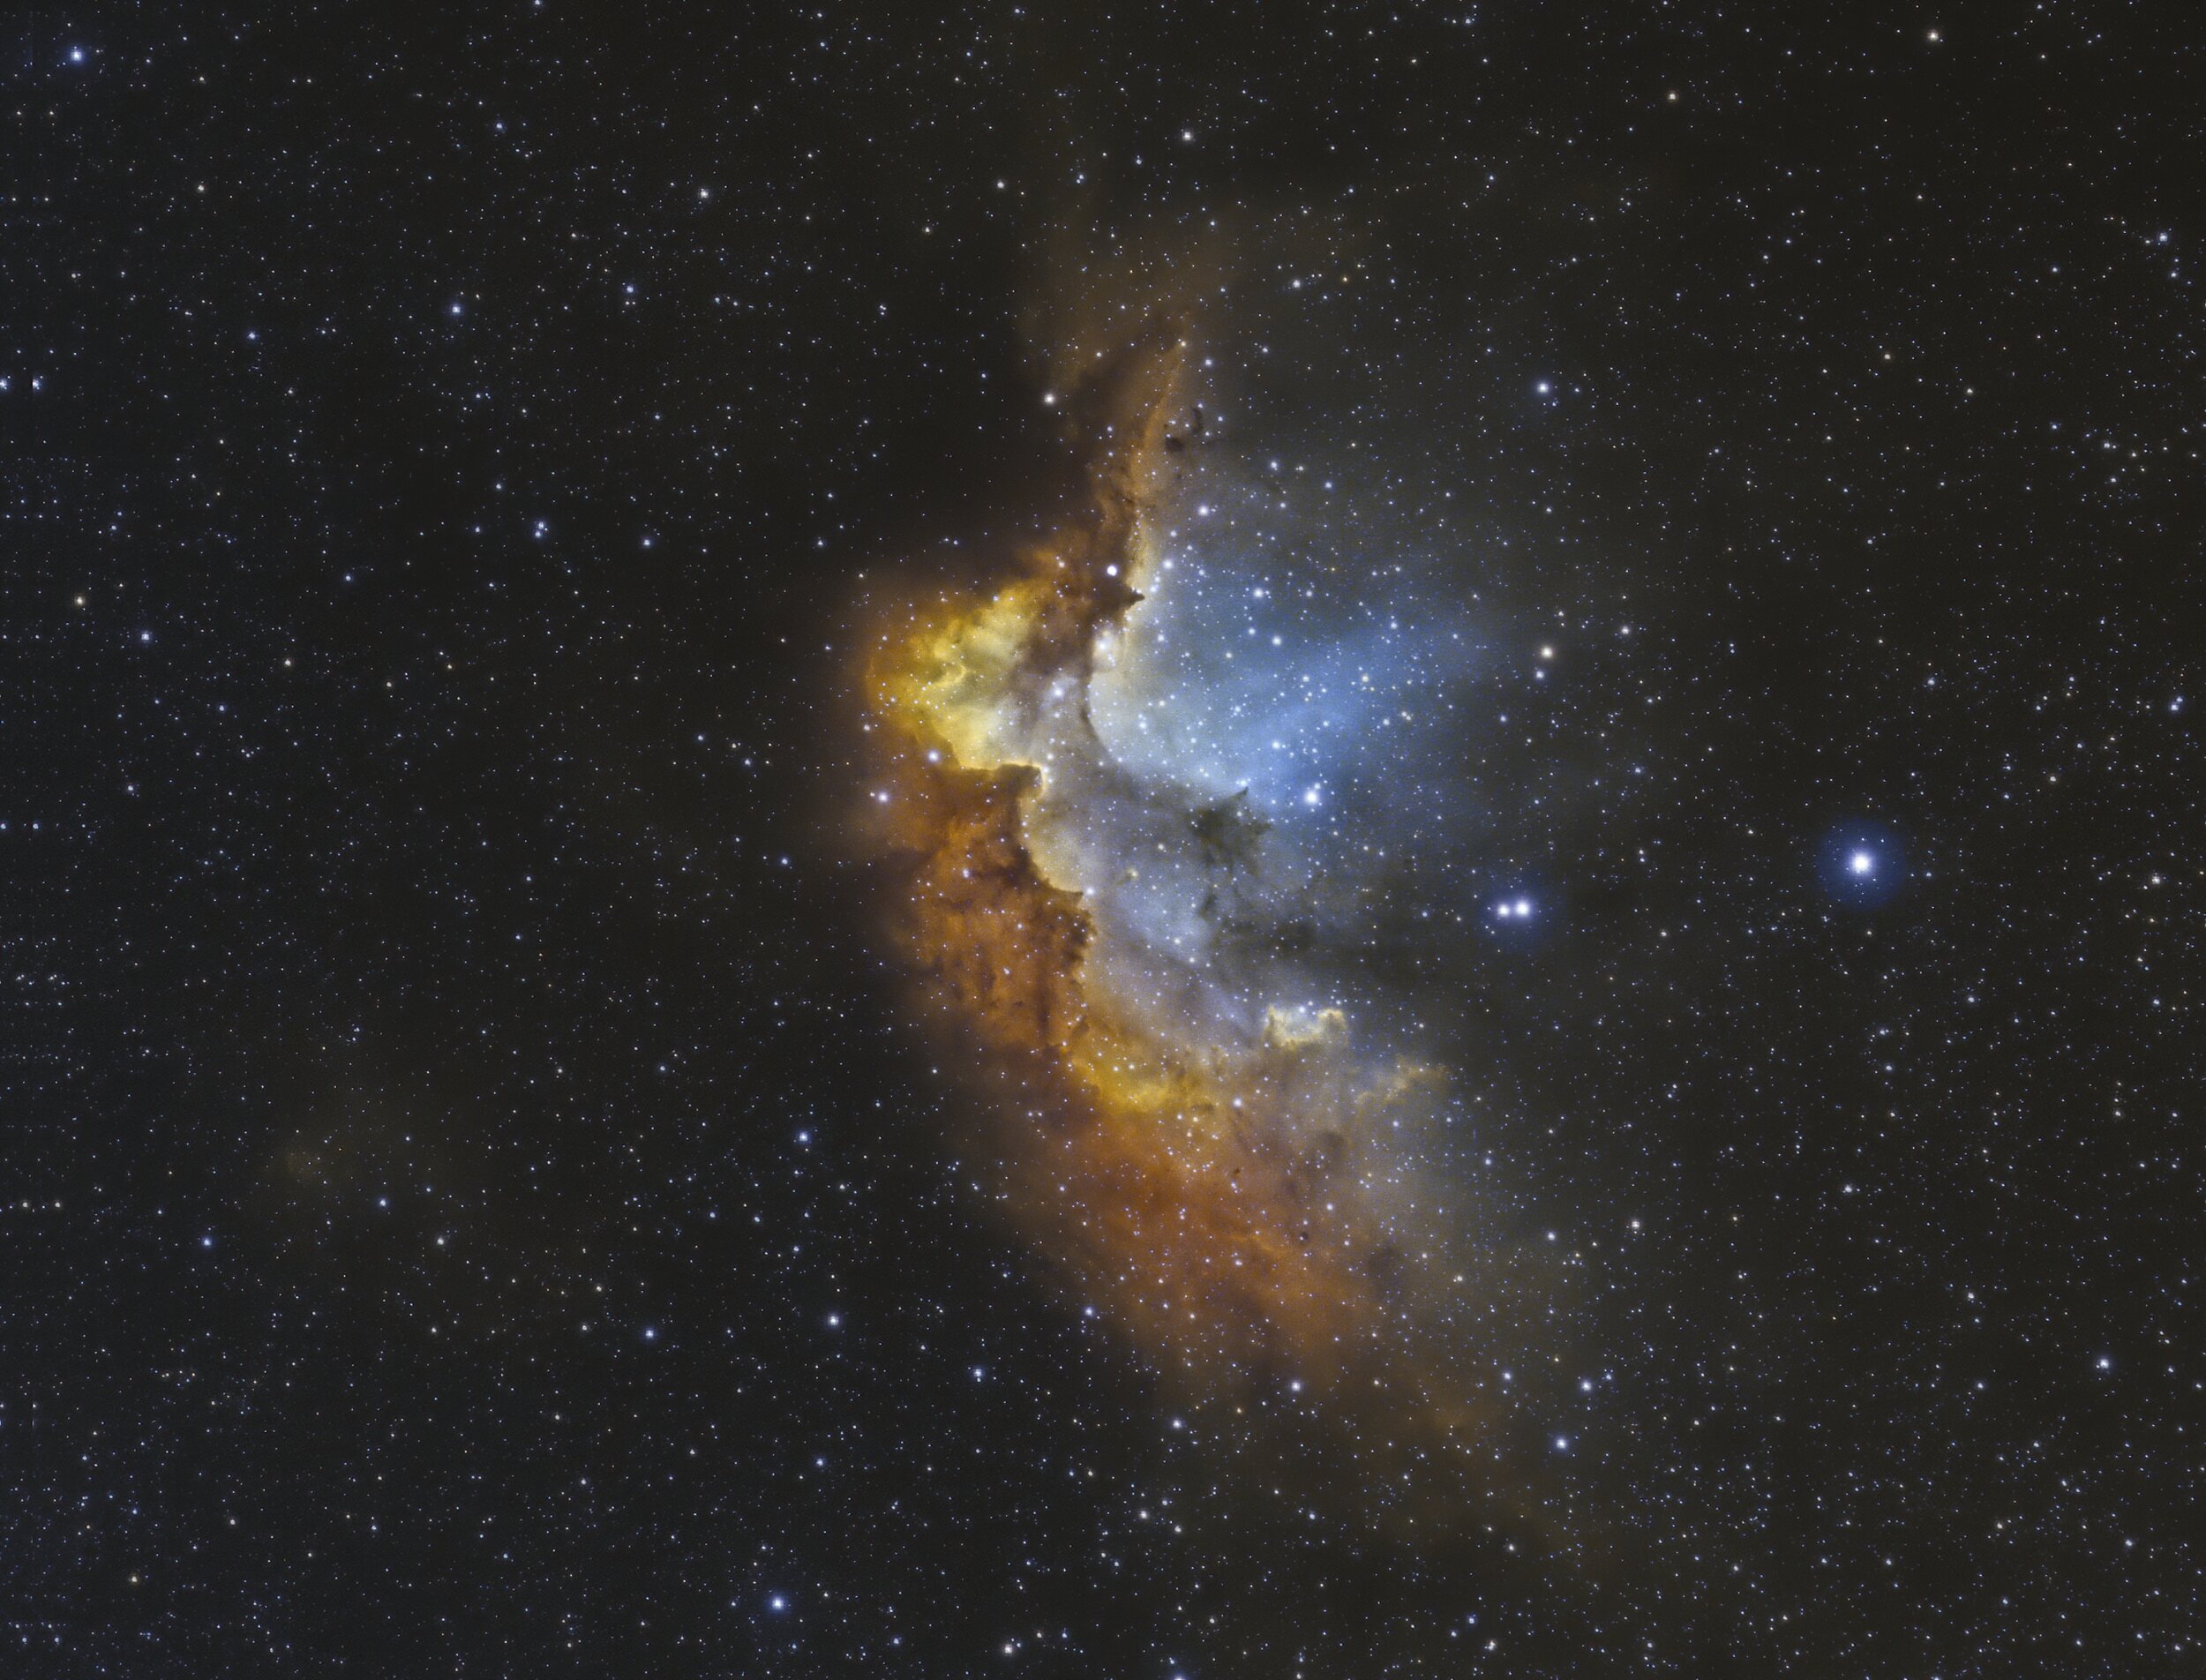
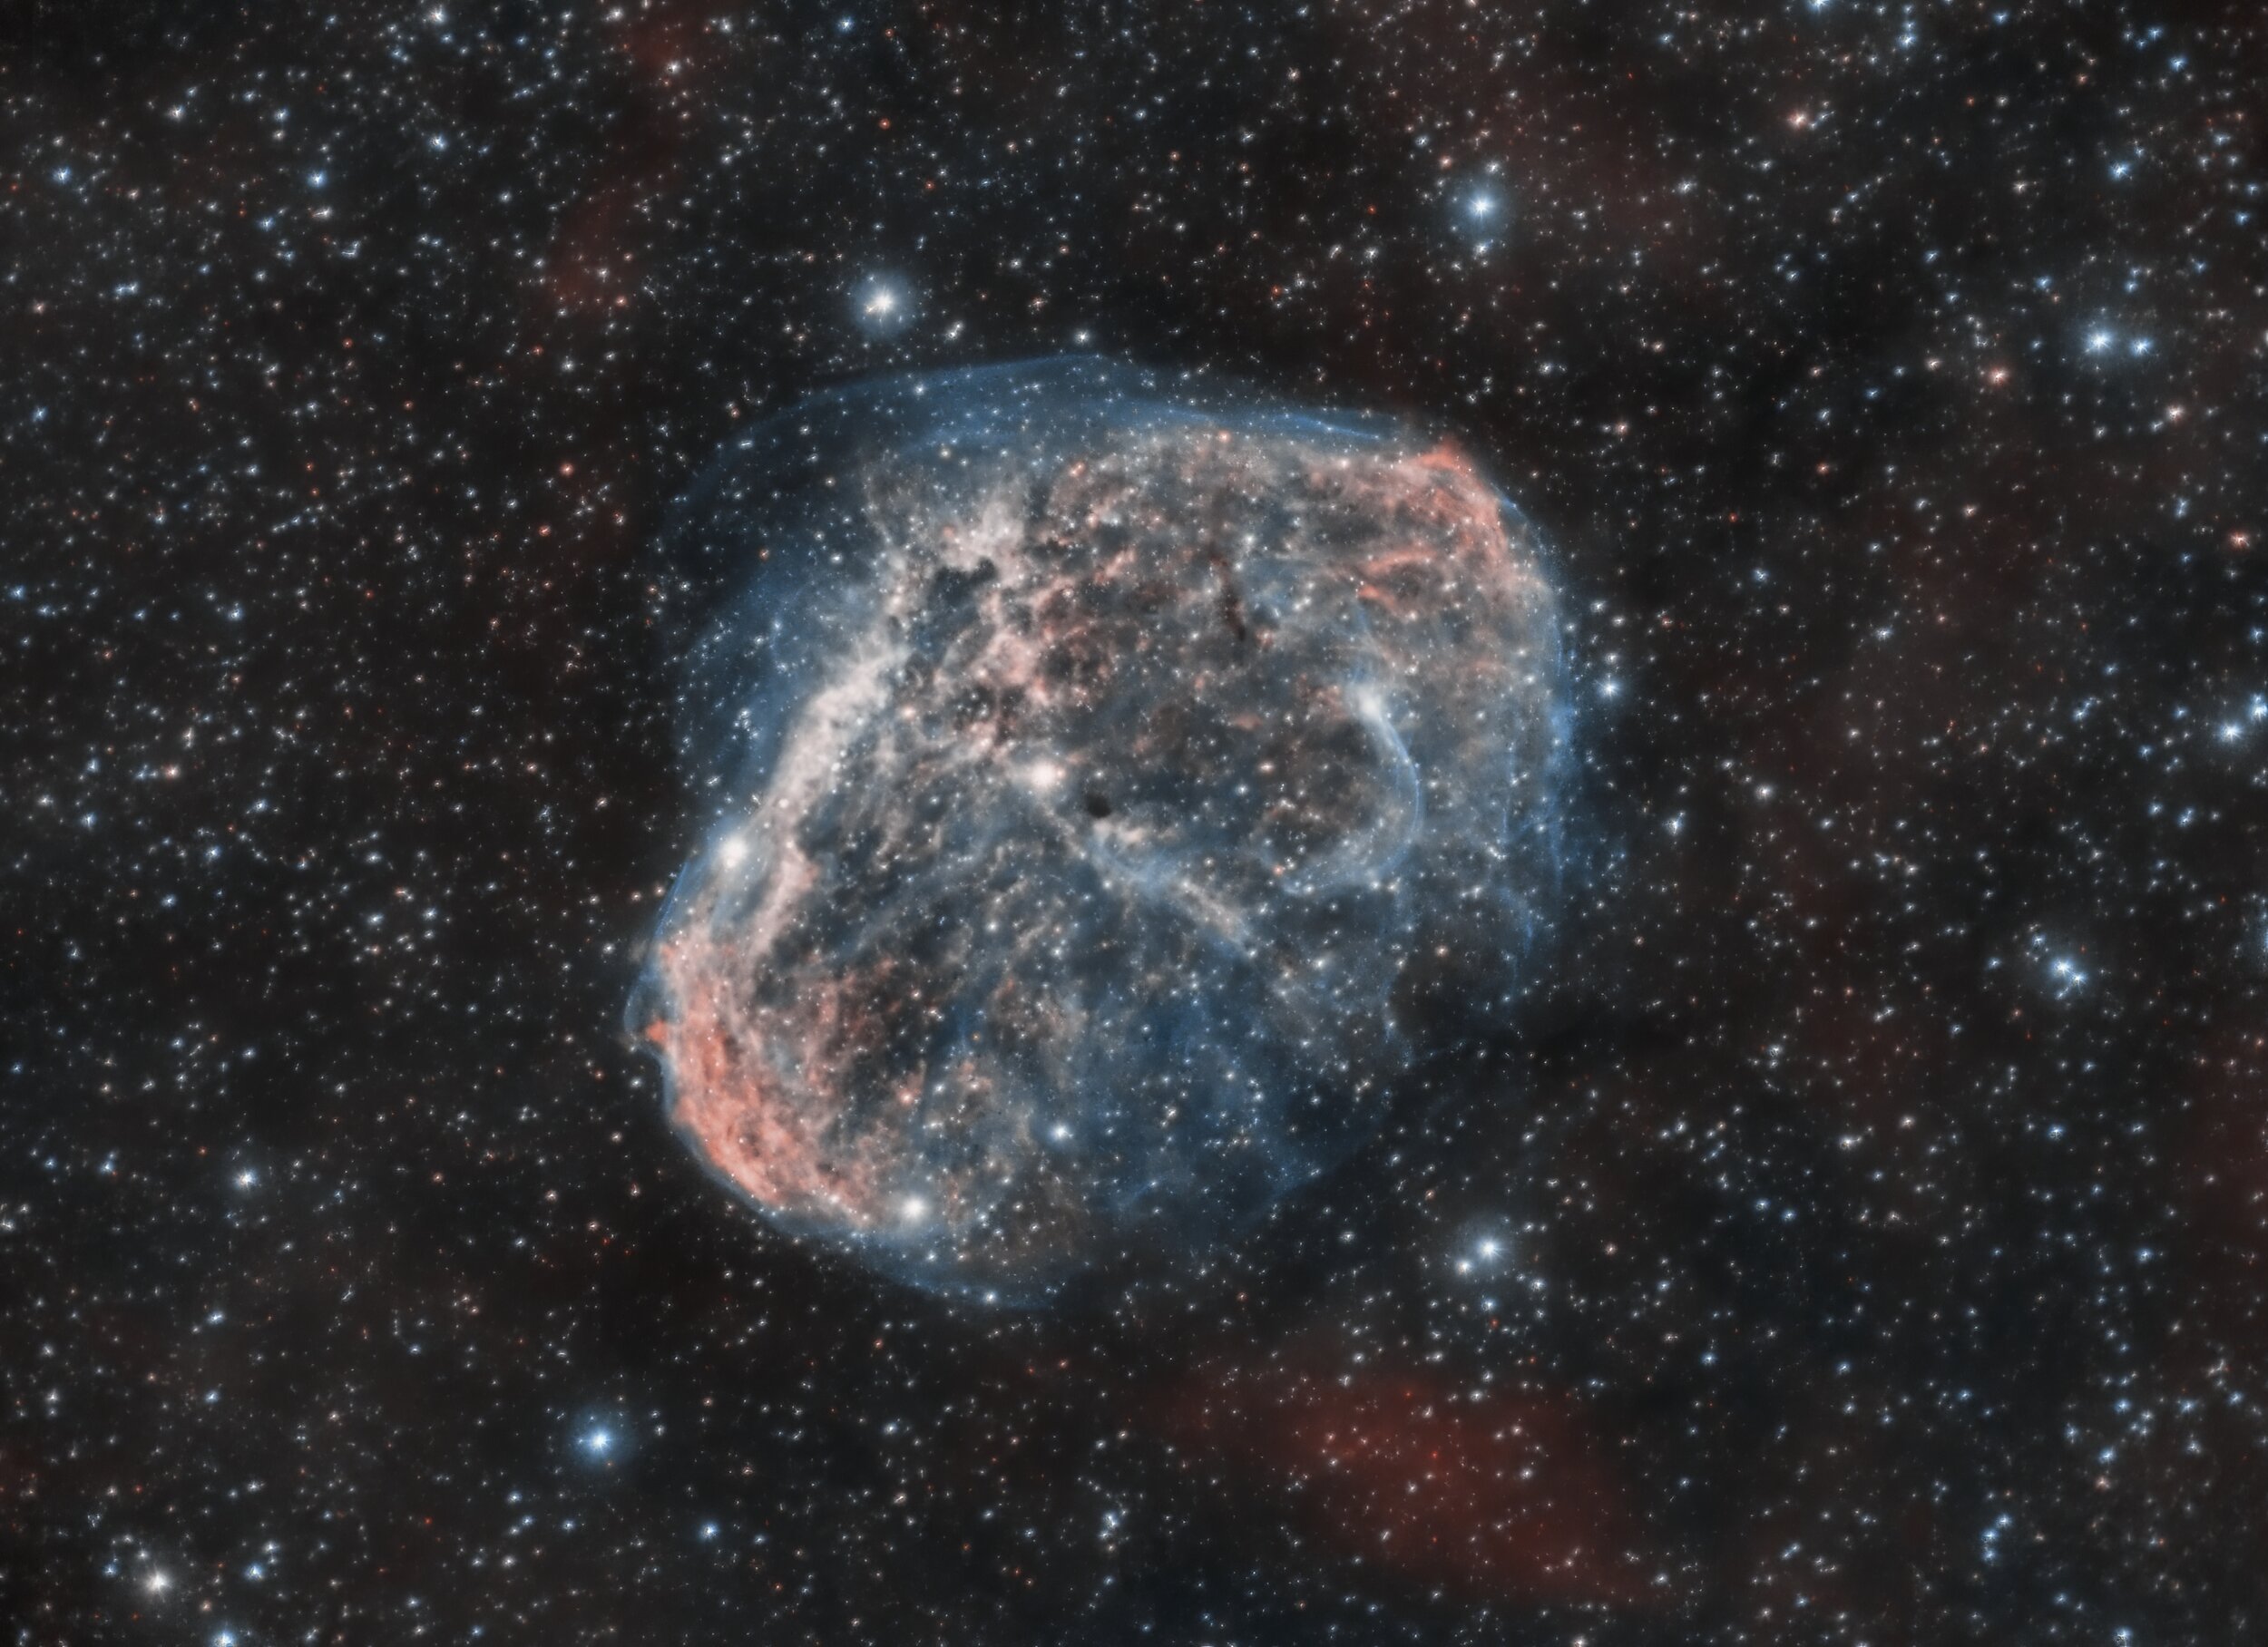
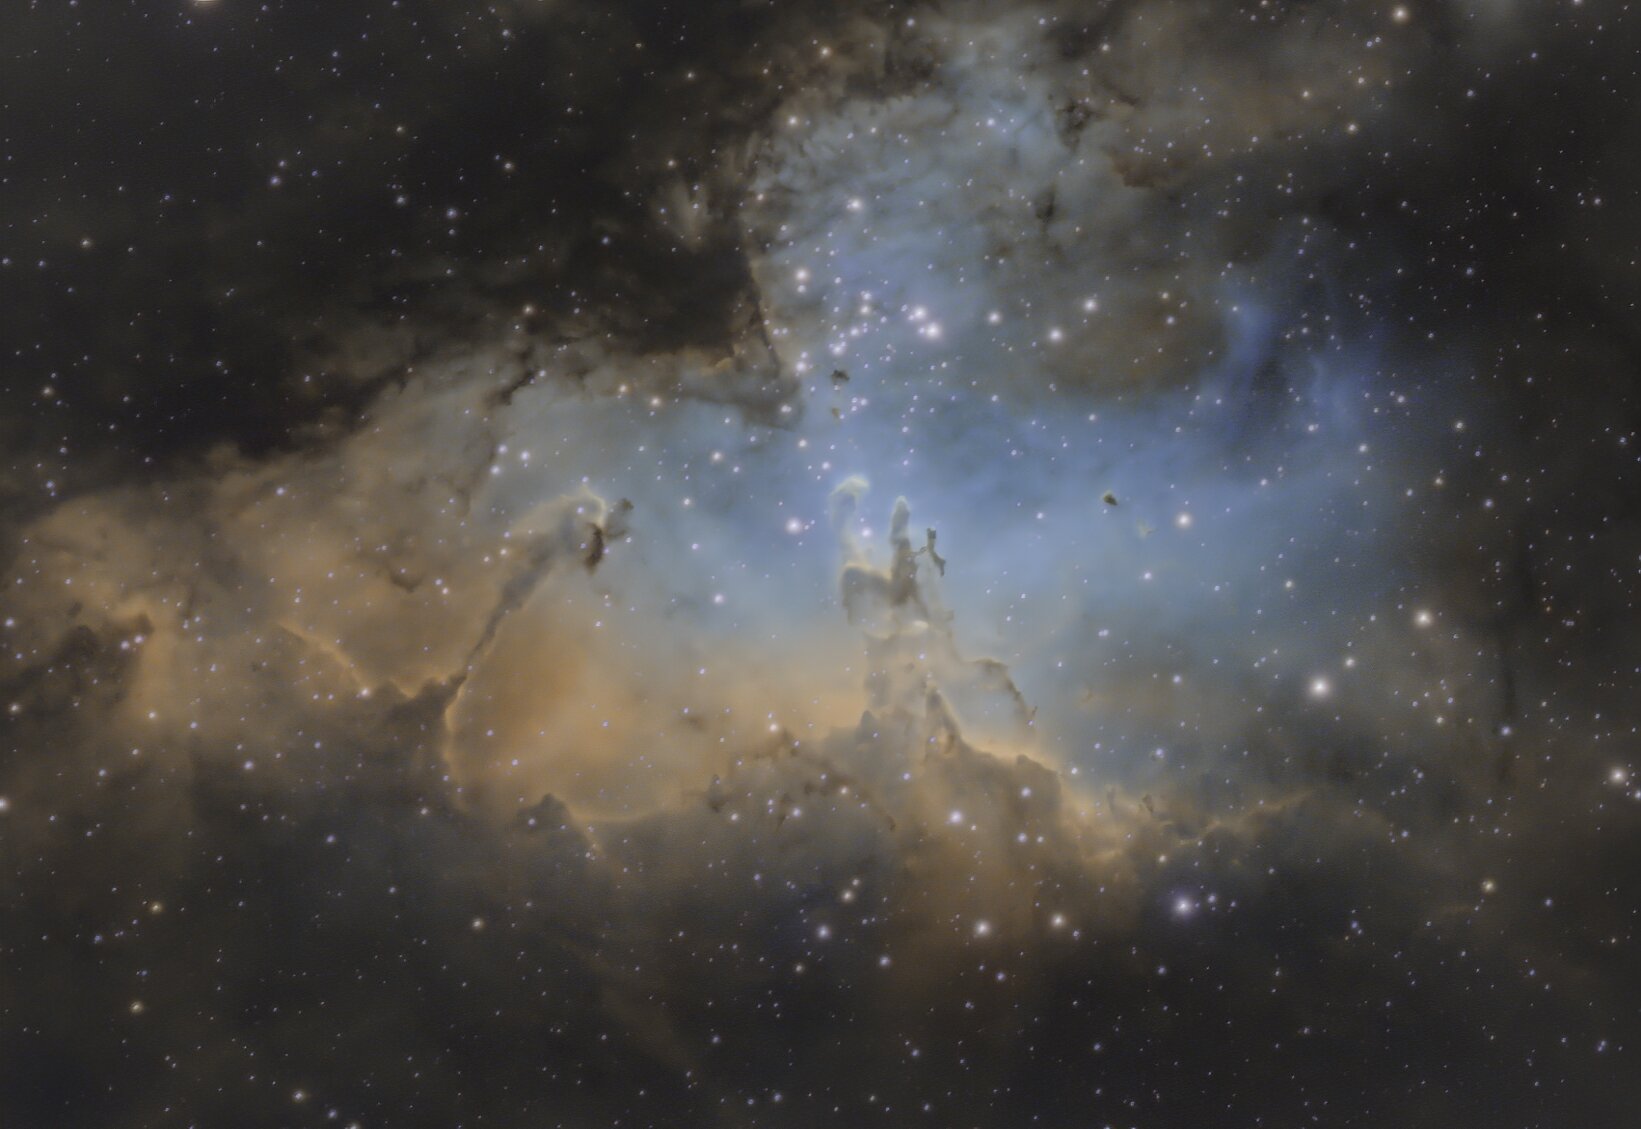
Along with this comes the use of filters. There is a built in filter wheel on this camera so I bought a set of narrowband filters. H-alpha, sulfur II, and oxygen III are the 3 most dominate wavelengths that make it down to our cameras from space. So that being said, I would need to shoot separate sessions of each of those wavelengths and ASSIGN a color to them in post processing. This was hard for me to understand at first but basically you take your h-alpha image and assign it to green, sulfur II is assigned to red, and oxygen III is assigned to blue. It is known as “false” color. But now you have MUCH more data, separate color channels, and a much better image to start processing. Here’s what I got with my first attempt -

combine_RGB_image_ABE-2-denoise-denoise.jpeg

Now we are talking. My first mono narrowband image ever. Here is what my thoughts are after it is all said and done… So the acquisition is definitely more time consuming. My images are going to go from 2 - 3 hours of integration to 5+ minimum. That is okay! I want to have beautiful pictures. Also seeing a black and white image sounds terrible but seeing the detail in those images is rewarding. The best thing about this is the post processing. It is a breeze! You have much more flexibility in your images and you are not stressing out and creating noise trying to stretch and pull colors out that are not there. I am extremely happy with my decision to go mono and look forward to creating some awesome images in the coming months!

A couple of nights of wide field after a great galaxy season

Well galaxy season was fun and it gave me some good times with my first big telescope, the Edge 8HD, but after not having any wide field targets for a few months, it was nice to get a couple shots out of the meade 70mm APO and try out my new Spacecat51! I had some troubles leading up to these shots because of my HEQ5 pro mount but they were worked out for these shots. I will save those fixes for another post. Here was my first target:

elephant3-denoise-denoise.jpeg

This is the Elephants trunk. It is huge… This was shot at 300 seconds x 30 subs. Used the L-enhance on the meade 70mm and this was my first use of my new asi071mc pro. Ive seen some excellent images of this target before and while mine doesn’t look like the hubble space pallet, I really like the way it turned out. I think I might try this one again because I think I can get more out of it. Here is my next night’s image:

veil-denoise-denoise.jpeg

Now we are talking! I think my horsehead nebula is my favorite image but this is a very close second and I did this from my backyard! Here is the eastern and western veil nebula. This is also another 30x300 second exposure and I did this with the Spacecat 51 and the asi294mc pro. I regret not using the 071 on this target because I think I could’ve pulled out a little more detail but its hard for me to complain about this image. I will definitely take some more shots at this as it comes up higher in the sky with some different setups. I also want to try and edit this image again and get rid of some stars. Dunno if that is possible but Im gonna try.

Galaxy Season!

So this is my first galaxy season and it has not disappointed! I have had a blast. I need to really catch up on sleep cause I have not been getting much. Ready glad I gave my Edge 8hd a second chance. It has become my favorite scope. Still trying to work things out with guiding but it is very usable. If anyone has any tips on a celestron OAG and 290mm-mini, let me know! It has been acceptable but not great.

Other than that, I think its time for me to collimate! I gave it a go last night but I don’t think I got it as accurate as I would have liked and I didn’t want to waste precious time. I ended up buying a Hotech SCA 1.5 inch laser collimator. I will load it into my equipment section with a write up when I get it going and hopefully it will get me some better focus.

I still want to get Bodes and Sunflower but so far, I have some pretty good photos of the galaxies I have shot. All these shots are at 1400mm and f7. Some are better than others but overall, Im super pumped about this rig again and even though it is a monster to set up and take down, it has been well worth it. Here’s what I got. Lemme know whatcha think!

IMG_1074.PNG

m100 - top left, m88 - top middle, m66 - top right, Caldwell 7 - bottom left, m51 - middle right, m101 - bottom right.

Imaging at 1400mm and F/7

Imaging is not easy. I have learned that over the past year. I have obsessed about it but as much as I do, it doesn’t make it any easier. In one of my earlier blog posts, I explained how I started imaging with hyperstar and an Edge 8hd and how/why I moved to a smaller, more portable rig. I kept my Edge to use it for deep space imaging that a wide field refractor might not pick up the detail on. I had tried it twice with a .7 reducer and OAG to no avail. In fact, the 2nd time I was upset and ready to sell my big mount and scope. I calmed down and told myself I would do a little more research and give it one more try. That try came last night. Here was my set up:

IMG_0977.jpg

The night started off the same as the others. There are 3 things I needed working. I needed my main camera to focus, I needed my guide camera to focus, and I needed my mount to connect to everything so the my guide camera could make the tracking adjustments it needed to guide. One or more of these items never worked. Finally at about 12:30am, it all came together. My mount connected, I was able to focus my guide camera, and then begin guiding. It was a very rewarding feeling. It was pretty spot on with the exception of some very gusty winds. It yielded this image:

m101-denoise-denoise.jpeg

This is M101, the pinwheel galaxy. I have imaged this before but with a smaller refractor. I am very proud of this image and for only 20 sub frames at 300 seconds per image, gusty winds, and a quick pixinsight edit, I think it came out pretty good. I would like to get data totaling up to about 5 hours on this galaxy and see what I can do with it. I had read about how tough it is to image at this focal length and beyond and I will have to agree, it is not nearly as easy as imaging with a small refractor or hyperstar. But I finally got it. I will post a video on my setup and how I was able to get all this working very soon so that anyone else who might have a similar setup to mine can have a little bit of a head start. Tonight I will be shooting m51 so stay tuned!

My Trip to Terilingua

A couple of weekends ago, I decided to take my Meade 70mm APO refractor imaging scope down to Big Bend and the ghost town of Terilingua. Big Bend is know around the country as one of the few “dark” sites with zero light pollution. I was pretty excited when the weather started to look very favorable for not only taking some great pics of galaxies and nebulas, but also to get some of my first shots of our own galaxy, the milky way. With as little as a tripod and a DSLR camera, one can do astrophotography and the milky way is the perfect place to start.

The first night, it was cloudy to start but looking at the forecast, the milky way was going to start coming up around 2 and the clouds were supposed to have moved out. So I set my alarm for 2am and went to sleep around 10pm. I didn’t need my alarm to wake me up. I was waiting for it around 1:30 and I went outside. It was a site I really cant explain. Total darkness and more stars than I could imagine. The milky way looked like a cloud coming towards me at first. I set up my tripod and star tracker and got my DSLR going with an intervalometer. I had a fast f2.8 14mm Rokinon on my camera to collect as much light as I could and also get a fairly wide angle of the sky. The hardest part was getting focus. I don’t think I was able to get it as you can see in my image. While its pretty, its not as sharp as I would like it:

The milky way with a Nikon D5300 and a Rokinon f2.8 14mm lens

The milky way with a Nikon D5300 and a Rokinon f2.8 14mm lens

Besides the fact that its out of focus, I was not able to find a good foreground (which I think is essential for a nice milky way shot).  So I got this.  Basically this has just given me a taste of what I can do and when I go back, I will be more prepared and hopefully get a better shot(s). 

On the next night and night after, I was able to enjoy a sunset while setting up my scope and the clouds would clear out both nights just as the sun was going down. It was perfect. I really wish I had more time there but since I didn’t and I wasn’t interested in staying up all night, I didn’t get as much exposure as I wanted. Each of my pics had exposure times of about an hour. 180 second subs and 300 second subs. I think the fact there was no light pollution helped me to get great images with less time but I can only imagine how awesome my images would be with 3x the integration. Here are my results from my trip:

M45 Pleiades

M45 Pleiades

M101 Pinwheel Galaxy

M101 Pinwheel Galaxy

M51 Whirlpool galaxy

M51 Whirlpool galaxy

Horsehead and Flame Nebula in Orion

Horsehead and Flame Nebula in Orion

I think one of the coolest things is in a couple of the images of galaxies, you can actually see smaller fainter galaxies. See if you can spot some! The last image of horsehead is probably what I am most proud of. I could look at the image all day. It was done with only 10-15 sub exposures of about 3 minutes per sub. I had an Optolong L-enhance filter on which will make the camera more sensitive to hydrogen alpha and Oiii ionized oxygen bands of light. With these pictures under my belt, I am excited for my next trip out to Terilingua and Big Bend to get some more targets!

One Year In....

Well this will be my first blog ever in my life. I want to elaborate more on why I decided to make a site like this in a later blog but for now, I wanted to show a quick comparison of one of my first pics of andromeda and one of my latest edits. These two images are the same photo, just edited differently/”somewhat” correctly. The reason I say “somewhat” is because I think I can still get better but I feel like my latest picture is pretty respectable. Here is the first picture shot with a hyperstar and edited in lightroom.

80755803_2552889474978917_4422507183078375424_n.jpg

As you can see, its grainy, not sharp, probably stretched way too much, just overall not good. At the time I thought it was amazing though and to most people, it was. But after seeing all the amazing pictures online, I decided to go back to the drawing board and dive into photoshop. And I mean really dive. I had never used it before and had no idea what I was doing. Thanks to some online tutorials and a lot of practice and trial and error, I was able to achieve the image you see below. This was done by stretching the image, changing the overall colors, adding texture, and bringing down the noise a bit. I don’t like to use brushes or things like that because I like to preserve as much of the natural image as possible and I don’t want to feel like its fake.

andromeda.jpg

This was my most recent edit of andromeda. There is dimension, the core is not blown out, you can almost see the rotation. This is what I wanted. This is what I felt like I saw when I googled “andromeda”. The time I have put into this hobby in this first year has to be 100s of hours. I have become addicted. It has been frustrating and rewarding at the same time. So basically Im hoping what I have planned for my little site here can help the people, like me, who are captivated by the night sky. I will be adding things as I go that I wish I could’ve found for my set up that would’ve helped save me some major headache. Welcome to my page and I hope I can be of some help in the future!